The Ultimate Guide to Cleaning Your Oil Diffuser: Tips & Tricks for Peak Performance
Introduction: Why Cleaning Your Diffuser Matters
Essential oil diffusers have become increasingly popular, transforming homes into sanctuaries of wellness and fragrance. From invigorating citrus blends to calming lavender, these devices offer a natural way to enhance mood, purify the air, and create a personalized aromatic ambiance. Whether you’re a seasoned aromatherapy enthusiast or just beginning your journey with essential oils, understanding the importance of regular diffuser cleaning is crucial for maximizing its benefits and ensuring a healthy home environment. Think of your diffuser as a small humidifier; if left uncleaned, it can accumulate residue, diminishing its performance and potentially harboring unwanted bacteria or mold. Just as you wouldn’t leave a humidifier unattended, your oil diffuser requires consistent care to maintain its effectiveness and longevity. Regular cleaning not only ensures optimal mist output and prevents clogged nozzles, but it also safeguards against the buildup of microorganisms that could compromise the air quality you’re striving to improve. This comprehensive guide will delve into the essential steps for keeping your diffuser clean, functioning perfectly, and maximizing the benefits of your aromatherapy practice. Proper diffuser maintenance is an investment in your well-being, ensuring a consistently pure and fragrant experience. In the realm of aromatherapy, essential oils are treasured for their therapeutic properties, and a clean diffuser ensures these benefits are delivered effectively. Using a clean diffuser maximizes the therapeutic potential of your essential oils by ensuring a pure, uncontaminated mist. Imagine trying to enjoy the calming effects of lavender while the diffuser is partially clogged, emitting a weak and uneven mist. Regular cleaning, therefore, becomes an integral part of the aromatherapy experience, allowing you to fully appreciate the subtle nuances and therapeutic power of each essential oil. Furthermore, a clean diffuser contributes to a healthier home environment, aligning with the principles of air purification. By preventing the buildup of residue and potential microbial growth, you’re not only preserving the integrity of your essential oils but also ensuring the air you breathe is clean and fresh. For those seeking to enhance their home fragrance experience, a well-maintained diffuser is paramount. A clean diffuser ensures that the fragrance of your chosen essential oils is dispersed evenly and effectively, creating the desired ambiance. Whether you prefer the uplifting scent of citrus fruits or the grounding aroma of woody notes, a clean diffuser is essential for achieving the perfect aromatic balance in your home. Imagine trying to create a relaxing atmosphere with a diffuser that’s clogged with residue from previous uses; the fragrance will be distorted and less impactful. Regular cleaning, therefore, is an essential step in curating a consistent and delightful home fragrance experience. This meticulous approach to diffuser care allows you to fully enjoy the aromatic benefits of essential oils, transforming your living space into a haven of personalized fragrance. From the subtle notes of floral blends to the invigorating scents of peppermint or eucalyptus, a clean diffuser ensures that your home is always filled with the desired fragrance profile, enhancing your mood and overall well-being.
Understanding Different Types of Oil Diffusers
Understanding the nuances of different oil diffuser types is crucial for effective diffuser maintenance and cleaning, a key aspect of both aromatherapy and home fragrance. Ultrasonic diffusers, which are incredibly popular for their versatility and quiet operation, utilize high-frequency sound waves to vibrate a small disc, creating a fine mist of water and essential oils that disperses into the air. This process is ideal for humidifying a space while simultaneously delivering the therapeutic benefits of essential oils, making it a cornerstone of many aromatherapy practices and a popular choice for those seeking to improve their home’s air quality. Because they rely on water, ultrasonic diffusers are prone to mineral buildup and bacterial growth if not cleaned regularly, impacting their mist output and potentially compromising the quality of the diffused air. Therefore, regular cleaning, usually every 2-3 uses, is essential to ensure they continue to function efficiently and provide a clean aromatherapy experience. Nebulizing diffusers, on the other hand, operate differently, employing pressurized air to atomize essential oils into a fine mist without the need for water. This method delivers a more concentrated dose of essential oils, making it a preferred choice for intense aromatherapy sessions and for those focusing on air purification. The lack of water reduces the risk of mold and bacteria growth, but the fine nozzles of nebulizing diffusers can still become clogged with oil residue, especially when using thicker oils. Regular cleaning, though less frequent than with ultrasonic models, is still vital to maintain optimal performance and prevent blockages that could hinder the diffusion process. Heat diffusers, often simpler in design, gently warm the essential oil to release its aroma. This method, while effective for fragrance, does not produce the same level of therapeutic benefits as ultrasonic or nebulizing diffusers because the heat can alter the chemical composition of some oils. The cleaning needs for heat diffusers are generally minimal, focusing on removing oil residue from the heating element. Evaporative diffusers, which use a pad or wick to disperse scent, also require less frequent cleaning, but the pad or wick needs occasional replacement to maintain effective scent diffusion. Choosing the right type of diffuser depends on your specific needs, whether you are focusing on aromatherapy benefits, home fragrance enhancement, or air purification. Understanding how each type works is the first step in ensuring you maintain it correctly, prolonging its lifespan and maximizing its effectiveness. Proper oil diffuser cleaning not only ensures your device performs optimally but also ensures that the therapeutic and aromatic benefits of your chosen essential oils are delivered cleanly and effectively, contributing to a healthier and more fragrant home environment. Regular maintenance prevents the buildup of residue that can interfere with the diffuser’s performance and also avoids the mixing of scents, allowing you to enjoy each essential oil’s unique aroma without unwanted cross-contamination. Neglecting cleaning can also lead to reduced mist output, inefficient scent diffusion, and in some cases, the growth of bacteria or mold, which can negatively impact air quality, making regular cleaning an essential part of responsible aromatherapy and home fragrance practices.
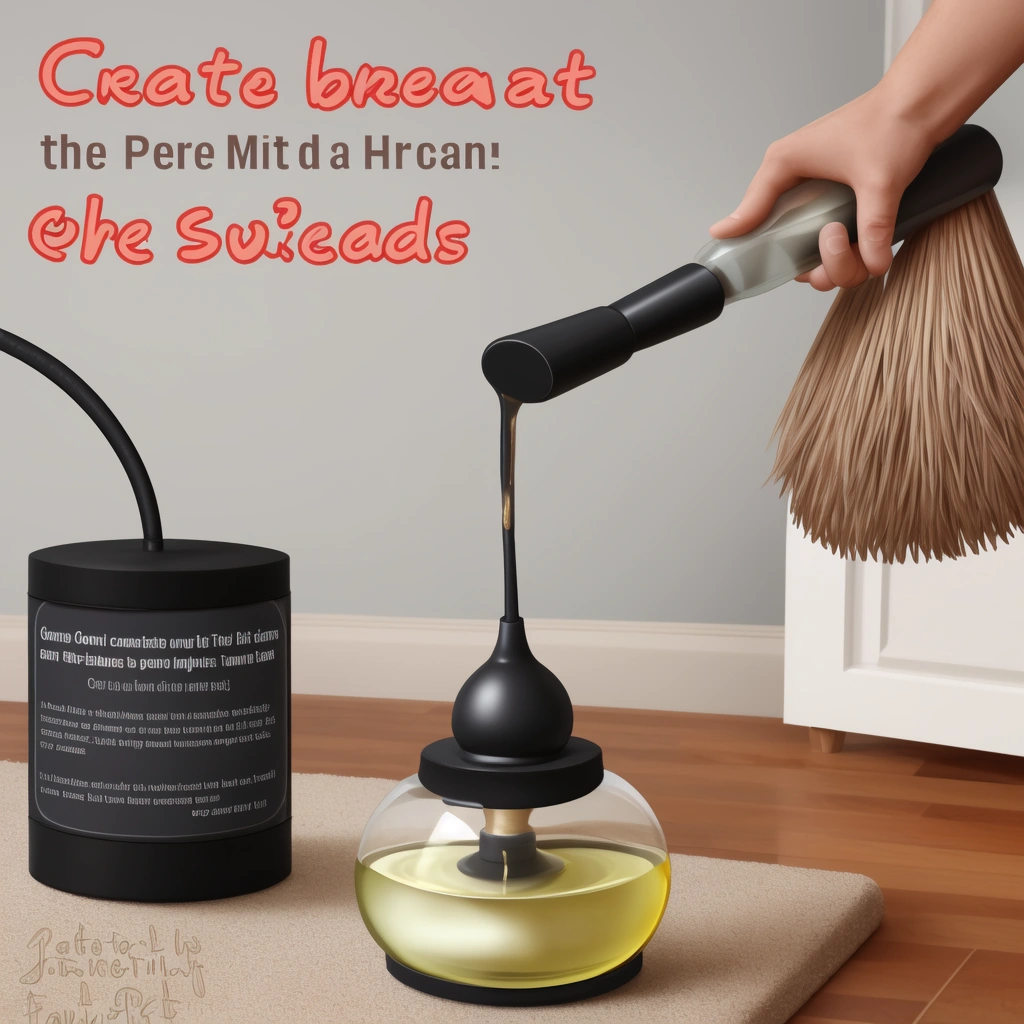
Step-by-Step Cleaning Instructions
The frequency of cleaning your oil diffuser is directly related to its usage and the types of essential oils you diffuse. As a general guideline, aim to clean your diffuser every 2-3 uses, or at least once per week, to prevent buildup and ensure optimal performance. However, certain essential oils, particularly thicker ones like myrrh or vetiver, and citrus oils such as lemon and orange, are more prone to leaving residue, requiring more frequent cleaning. Neglecting regular diffuser maintenance can lead to reduced mist output, clogged nozzles, and even alter the aroma profile of your essential oils, diminishing their therapeutic benefits and overall home fragrance experience. Therefore, understanding the nuances of essential oil diffuser care is crucial for maximizing the advantages of aromatherapy and air purification. Here’s a detailed step-by-step guide to ensure your diffuser operates at its peak potential.
First, always begin by unplugging your diffuser from the power source to ensure safety. Carefully disassemble the unit according to the manufacturer’s instructions. This usually involves removing the top cover, the water tank, and any other removable components. This step is critical as it allows you to access all areas that require cleaning and prevents damage to the electrical components. Disassembling your diffuser properly also gives you a chance to familiarize yourself with its construction, which can be helpful for future diffuser maintenance. Once disassembled, you are ready to move on to cleaning the individual parts.
Next, focus on cleaning the water tank or reservoir, which is the area most prone to buildup. Begin by rinsing the tank with clean, warm water to remove any loose residue. For a more thorough clean, prepare a solution of equal parts white vinegar and water or a mixture of warm water with a few drops of gentle dish soap. Fill the tank with this solution and allow it to sit for about 15 to 30 minutes. This soaking period is crucial for loosening any stubborn oil deposits and mineral buildup. After soaking, use a soft cloth or sponge to gently scrub the inside of the tank. Be sure to rinse the tank thoroughly with clean water afterward, ensuring no cleaning solution remains, which could interfere with the aroma of your essential oils. This step is key for both home fragrance and the efficacy of aromatherapy.
Pay special attention to the atomizer or nebulizer, the component responsible for creating the mist. For ultrasonic diffusers, this is typically a small disc or plate found at the base of the water tank. Gently wipe this area with a cotton swab dipped in rubbing alcohol. Rubbing alcohol is ideal for removing oil residue and preventing bacterial growth, without leaving a scent. For nebulizing diffusers, refer to the manufacturer’s guidelines for cleaning the nebulizer component, as these may vary significantly. It is very important to avoid using harsh chemicals or abrasive materials, as these can damage the delicate components and impact the diffuser’s functionality. Regular care of this part will contribute to consistent air purification.
Do not overlook the exterior of your diffuser. Clean the exterior with a damp cloth to remove any dust, fingerprints, or oil residue that may have accumulated. This step maintains the overall aesthetic appeal of your home fragrance device and prevents the buildup of grime. Once you have cleaned all the individual parts, it’s essential to ensure they are completely dry before reassembling. You can either air dry the components or use a clean, dry cloth to pat them dry. Ensuring all parts are completely dry will prevent the growth of mold or mildew, which can negatively impact the air quality and overall aromatherapy experience. Finally, reassemble your diffuser, making sure all the parts are properly aligned and securely in place. Following these steps ensures your diffuser is clean, functional, and ready to enhance your living space with the therapeutic benefits of essential oils.
Deep Cleaning Techniques, Troubleshooting, and Maintenance Tips
Sometimes, regular cleaning isn’t sufficient to tackle stubborn buildup or mineral deposits that accumulate over time in your oil diffuser. For a more thorough deep clean, try soaking the water tank in a solution of equal parts white vinegar and distilled water overnight. This allows the vinegar’s acidity to break down the mineral scale and oil residue effectively. After soaking, use a soft brush or sponge to gently scrub away any remaining deposits, paying close attention to corners and crevices. For particularly stubborn areas, a paste made from baking soda and a little water can act as a gentle abrasive, but be sure to rinse thoroughly afterward to prevent any residue from interfering with the diffuser’s operation.
To address those hard-to-reach areas, such as the nozzle or atomizer, a cotton swab or pipe cleaner dipped in rubbing alcohol is an excellent solution. The alcohol helps to dissolve oily residue and disinfect the area, ensuring optimal mist output and preventing clogs. If your diffuser is producing unusual noises or exhibiting a weak mist output, it’s often a sign of a clogged nozzle or atomizer. Before attempting any repairs, always refer to the manufacturer’s instructions for specific troubleshooting steps, as each diffuser model may have unique requirements. Ignoring these warning signs can lead to further damage and decreased performance of your essential oil diffuser.
Preventative measures are just as crucial as deep cleaning when it comes to diffuser maintenance. Using distilled water instead of tap water is a simple yet effective way to minimize mineral buildup, as tap water contains minerals that can accumulate and clog your device over time. Emptying your diffuser after each use also helps to prevent oil residue from hardening and becoming more difficult to remove. While some essential oils are generally safe for diffusers, citrus oils, in particular, can be more prone to causing buildup due to their higher concentration of compounds. Therefore, it’s best to avoid using citrus oils frequently or to clean your diffuser more often when using these oils.
For an added boost to your cleaning routine, consider incorporating essential oils with natural cleaning properties into your cleaning solution. A few drops of lemon or tea tree oil, for example, can help to further break down residue and leave your diffuser smelling fresh and clean. These oils also possess antimicrobial properties, which can help to keep your diffuser hygienic. Always remember to prioritize safety by unplugging your diffuser before cleaning and avoiding harsh chemicals or abrasive cleaners that could damage the device. By incorporating these cleaning and maintenance tips into your routine, you can ensure that your oil diffuser remains in peak condition, providing you with a consistent and enjoyable aromatherapy experience. Regular diffuser maintenance not only prolongs the life of your device but also ensures that you are getting the full therapeutic benefits of your essential oils and maintaining the air purification properties.
Conclusion: Prioritizing Regular Cleaning
Regular cleaning and maintenance are essential for keeping your oil diffuser functioning optimally and ensuring a healthier aromatherapy experience. A clean diffuser not only performs better but also contributes to a purer and more beneficial diffusion of essential oils. By following these guidelines, you can prevent buildup, troubleshoot common issues, and extend the life of your diffuser, maximizing your enjoyment of aromatherapy, home fragrance, and improved air quality. Neglecting regular cleaning can lead to a diminished aromatic experience, reduced mist output, and even potential damage to the device. Think of it like any other appliance in your home – regular upkeep is key for optimal performance and longevity.
Distilled water is highly recommended for use in your diffuser, as it lacks the minerals found in tap water that can lead to buildup and clogging. This buildup can interfere with the delicate mechanisms of ultrasonic diffusers, hindering their ability to create a fine mist. For nebulizing diffusers, mineral deposits can restrict airflow and diminish the intensity of the aroma. Using distilled water is a simple yet effective way to protect your investment and ensure consistent performance. Furthermore, the type of essential oils you use can also impact your cleaning routine. Citrus oils, for instance, are known to be more potent and can leave a stickier residue, requiring more frequent cleaning. Thicker oils like sandalwood or vetiver can also contribute to buildup, necessitating diligent maintenance.
Cleaning your oil diffuser regularly not only ensures its longevity but also enhances the quality of your aromatherapy experience. A clean diffuser allows for the unimpeded diffusion of essential oils, providing you with the full therapeutic benefits. For example, if you’re using lavender essential oil to promote relaxation, a clean diffuser will ensure a consistent and pure stream of lavender’s calming aroma, maximizing its effectiveness. Similarly, if you are diffusing citrus oils for an uplifting effect, a clean diffuser ensures a vibrant and refreshing fragrance, unhindered by residue buildup. This attention to detail enhances the overall experience of aromatherapy, home fragrance, and air purification.
Beyond the functional benefits, regular cleaning also contributes to a healthier environment. A buildup of essential oils and water can create a breeding ground for bacteria and mold, especially in humid environments. Cleaning your diffuser regularly helps prevent this, ensuring that the air you breathe is clean and pure. This is particularly important for those with allergies or sensitivities. By incorporating diffuser cleaning into your regular home care routine, you are contributing to a healthier and more pleasant living space, maximizing the benefits of air purification and home fragrance.
Remember to consult your diffuser’s specific instructions for detailed cleaning guidelines, as different models may have unique requirements. However, the general principles of regular cleaning, using distilled water, and being mindful of the types of oils you use apply across the board. With proper care, your diffuser will continue to provide you with the benefits of aromatherapy for years to come, contributing to a healthier and more fragrant home environment. By prioritizing regular diffuser maintenance, you’re not only preserving the life of your device but also ensuring a higher quality aromatherapy experience, contributing to your overall well-being and the enjoyment of your home environment.

